Quickstart
In this comprehensive guide, we'll navigate you through the essential steps to kickstart your journey with the Synaps API.
If you want to create an app and build your verification flow, refer to App and Verification Flow.
1. Get your API Key
-
In your app dashboard, click on Integration
-
At this stage, you have only the Sandbox API key available. This API Key is useful during the integration period. It helps you trigger different outcome of the verification flow in order to integrate seamlessy with your system for any case.
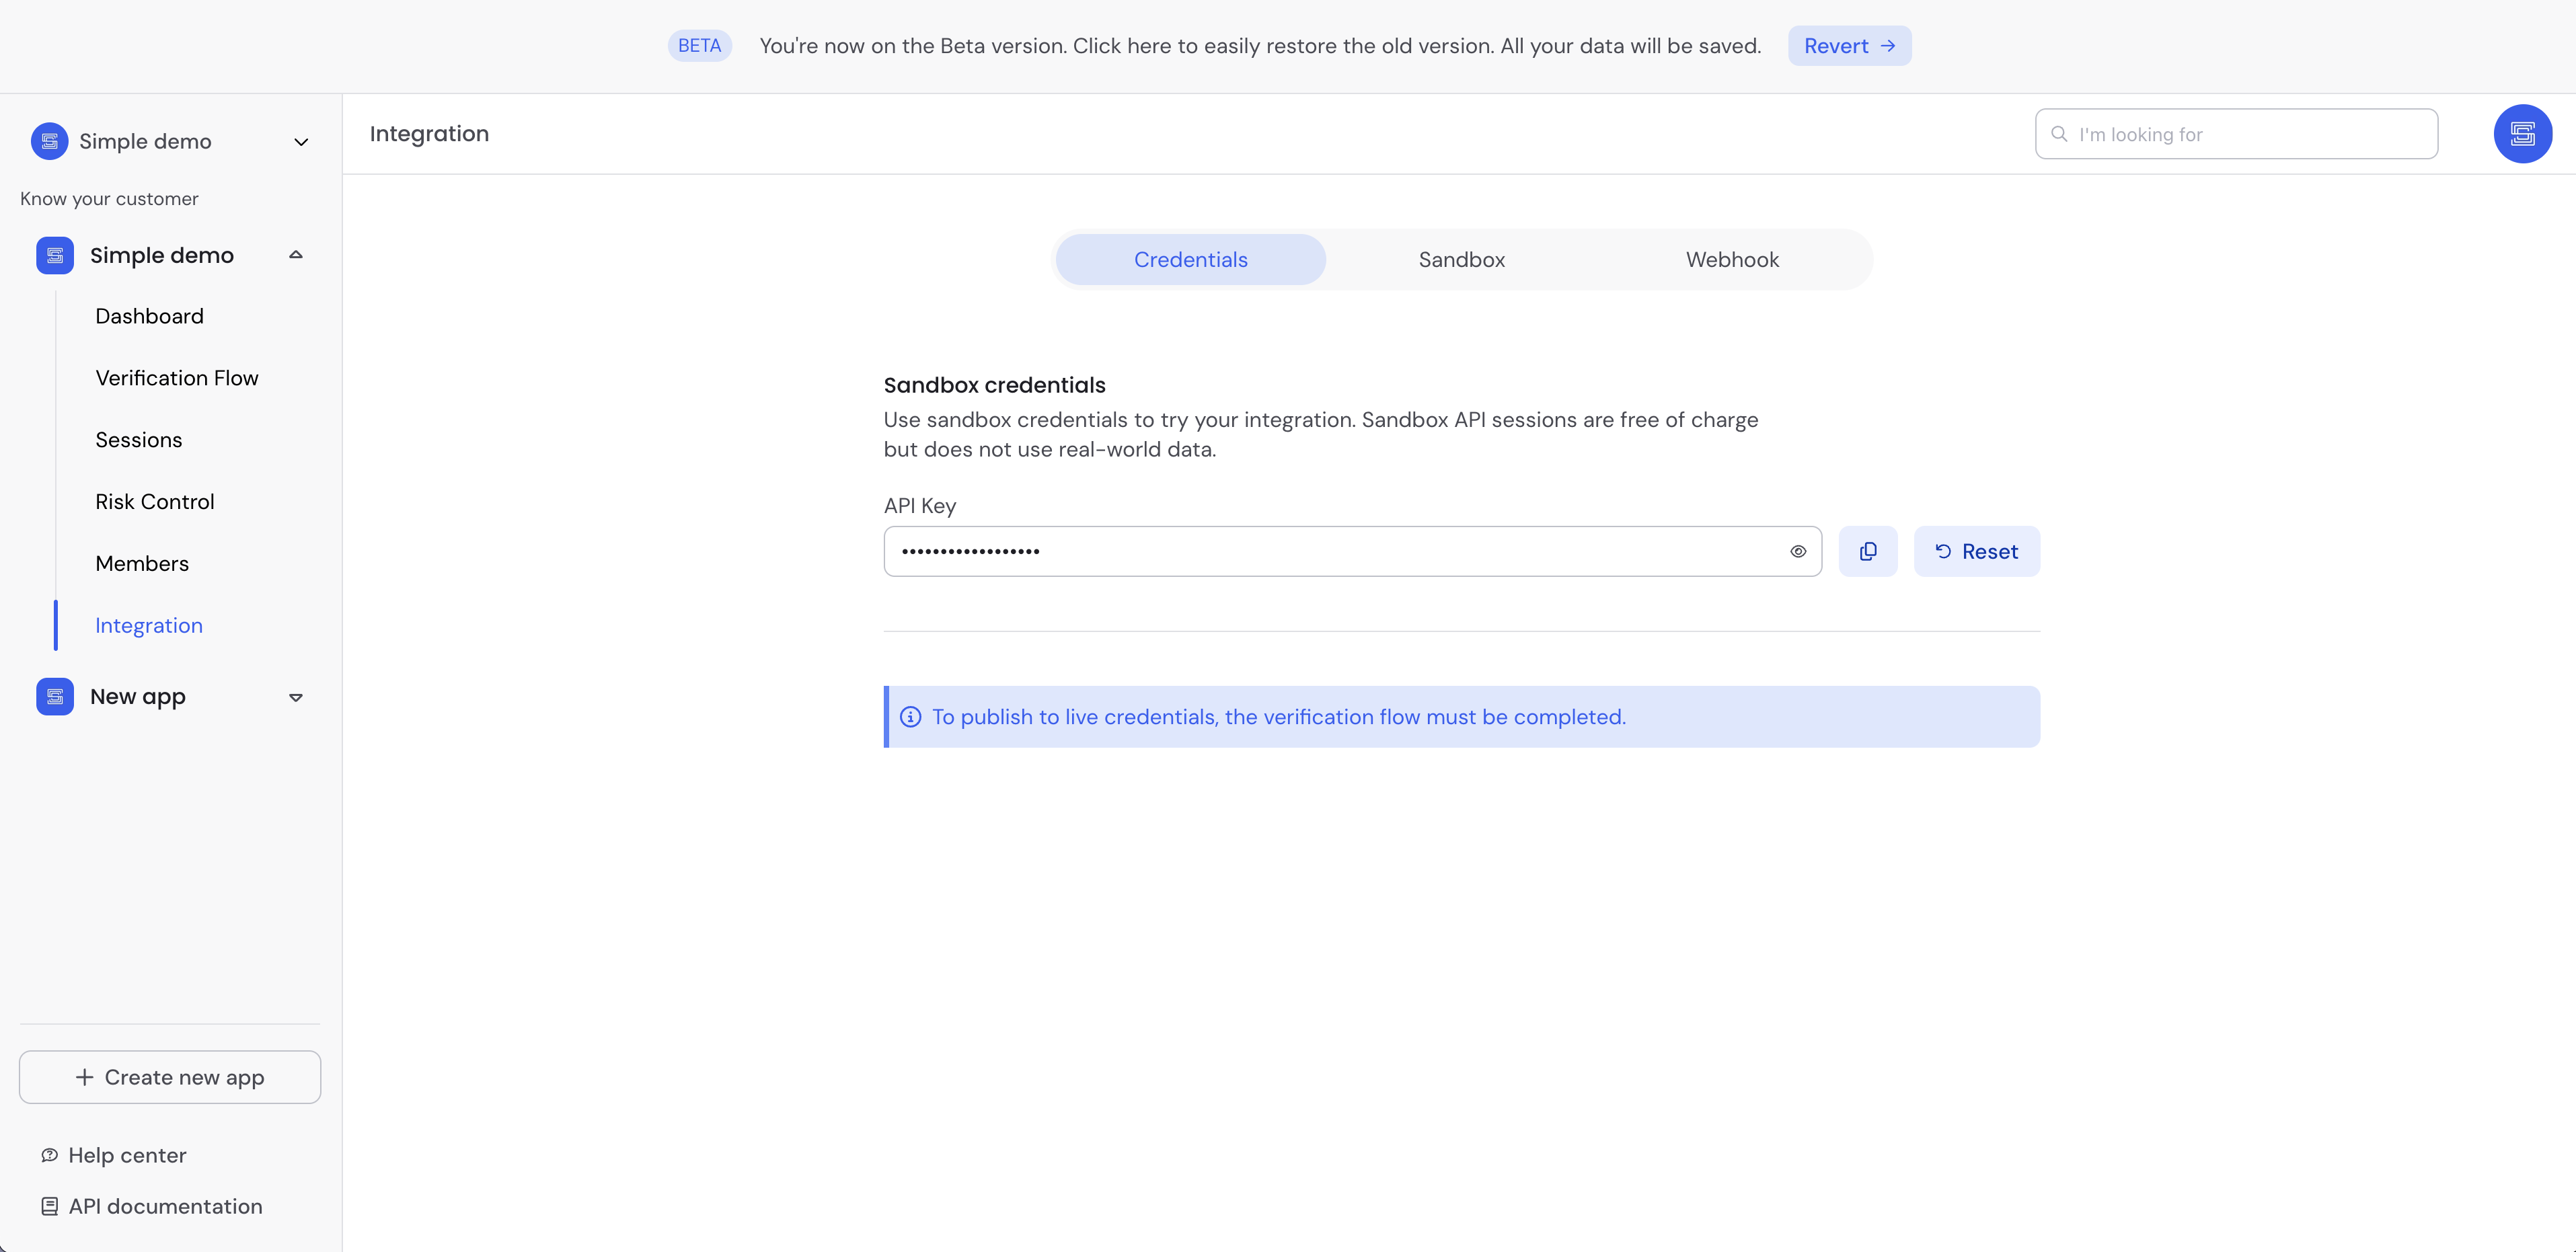
Sandbox mode is not intendend for production use. It is designed for developers to experiment with various integration results
- Your API Key is highly confidential and grants you access to sensitive personal user data. As such, it's imperative not to disclose it to anyone. Ensure it doesn't get uploaded to your source control system and is stored securely at all times.
2. Init a verification session
A verification session is a unique identifier intendend to track user's progress during the verification process. It must be linked to a unique user.
- Call the /v4/session/init endpoint with your favorite language
- cURL
- cURL alias
- Go
- Java
- Node
- Python
- Ruby
- PHP
curl --location --request POST 'https://api.synaps.io/v4/session/init' \
    --header 'Api-Key: YOUR_API_KEY'
curl --location --request POST 'https://api.synaps.io/v4/session/init' \
    --header 'Api-Key: YOUR_API_KEY' \
    --header 'Content-Type: application/json' \
    --data '{ "alias": "MY_ALIAS" }'
package main

import (
  "fmt"
  "net/http"
  "io/ioutil"
)

func main() {
  url := "https://api.synaps.io/v4/session/init"
  method := "POST"

  client := &http.Client {
  }
  req, err := http.NewRequest(method, url, nil)

  if err != nil {
    fmt.Println(err)
    return
  }
  req.Header.Add("Api-Key", "YOUR_API_KEY")

  res, err := client.Do(req)
  if err != nil {
    fmt.Println(err)
    return
  }
  defer res.Body.Close()

  body, err := ioutil.ReadAll(res.Body)
  if err != nil {
    fmt.Println(err)
    return
  }
  fmt.Println(string(body))
}
OkHttpClient client = new OkHttpClient().newBuilder()
  .build();
MediaType mediaType = MediaType.parse("text/plain");
RequestBody body = RequestBody.create(mediaType, "");
Request request = new Request.Builder()
  .url("https://api.synaps.io/v4/session/init")
  .method("POST", body)
  .addHeader("Api-Key", "YOUR_API_KEY")
  .build();
Response response = client.newCall(request).execute();
const response = await fetch('https://api.synaps.io/v4/session/init', {
  method: 'POST',
  headers: {
    'Api-Key': 'YOUR_API_KEY',
  },
  body: {
    alias: 'MY_ALIAS',
  },
})

console.log(response)
import os
import requests

api_key = os.getenv("YOUR_API_KEY")

url = "https://api.synaps.io/v4/session/init"
headers = {
    "Content-Type": "application/json",
    "Api-Key": api_key
}

try:
    response = requests.post(url, headers=headers)
    response.raise_for_status()
    data = response.text
    print(f"response: {data}")
except requests.exceptions.RequestException as err:
    print(f"Request error: {err}")
require "uri"
require "net/http"

url = URI("https://api.synaps.io/v4/session/init")

https = Net::HTTP.new(url.host, url.port)
https.use_ssl = true

request = Net::HTTP::Post.new(url)
request["Api-Key"] = "YOUR_API_KEY"

response = https.request(request)
puts response.read_body
<?php

$apiKey = getenv('YOUR_API_KEY');

$url = 'https://api.synaps.io/v4/session/init';
$headers = [
    'Content-Type: application/json',
    'Api-Key: ' . $apiKey
];

$ch = curl_init($url);
curl_setopt($ch, CURLOPT_POST, true);
curl_setopt($ch, CURLOPT_HTTPHEADER, $headers);
curl_setopt($ch, CURLOPT_RETURNTRANSFER, true);

try {
    $response = curl_exec($ch);
    if ($response === false) {
        throw new Exception(curl_error($ch), curl_errno($ch));
    }

    echo "response: " . $response;
} catch (Exception $e) {
    echo "Request error: " . $e->getMessage();
}

curl_close($ch);
API Response
{
  "session_id": "7cf6c33f-dff8-422d-a696-370db77782d8",
  "sandbox": true
}
3. Setup Verify SDK
The Synaps Verify SDK is a fully-featured user verification interface. As a plug & play component, it allows seamless integration on your platform within few minutes.
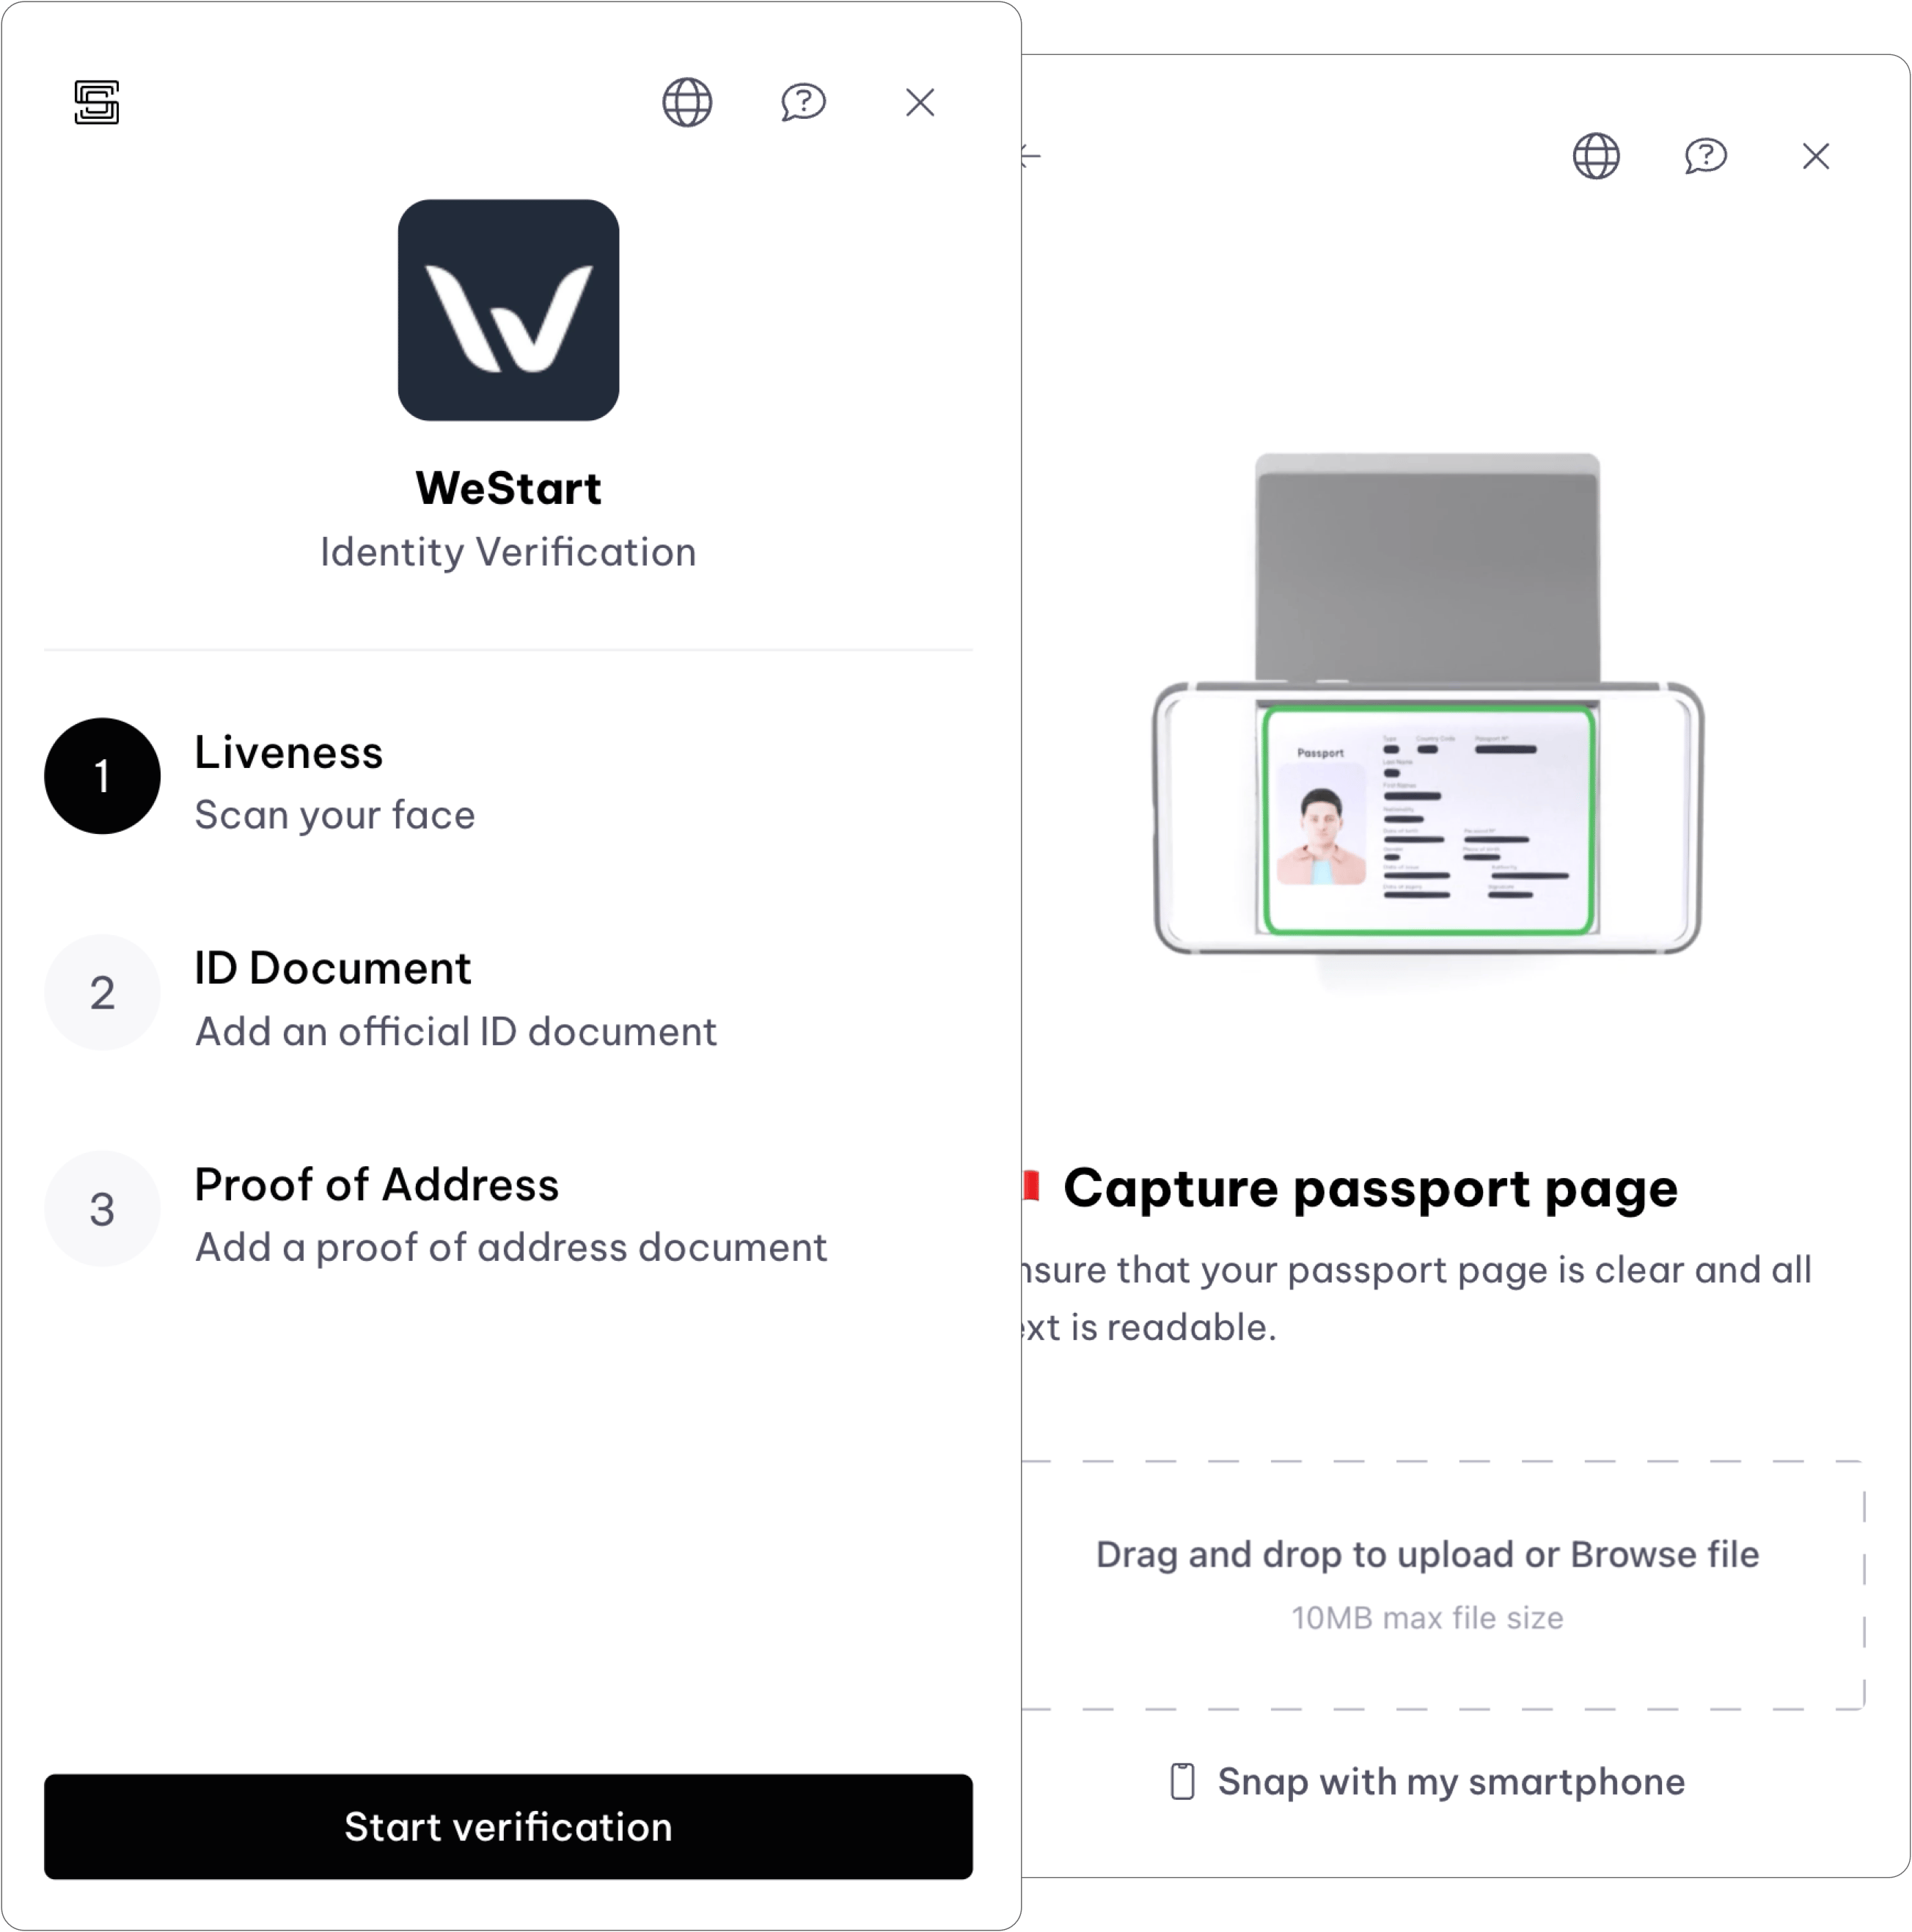
Refer to the Verify SDK section to learn more about the integration.
4. Configure webhooks
Webhooks are server-to-server HTTP callbacks enabling real-time data updates between applications upon specific event triggers.
To avoid you reaching Rate Limit, you must setup webhooks notification system. Each time there is a state changes on Synaps side, Synaps will trigger your webhook to notify you that something changed. You can then synchronize data from Synaps API to your database.
- Add your notification URL
Make sure to add an https endpoint and check Synaps secret each time you receive a wehbook
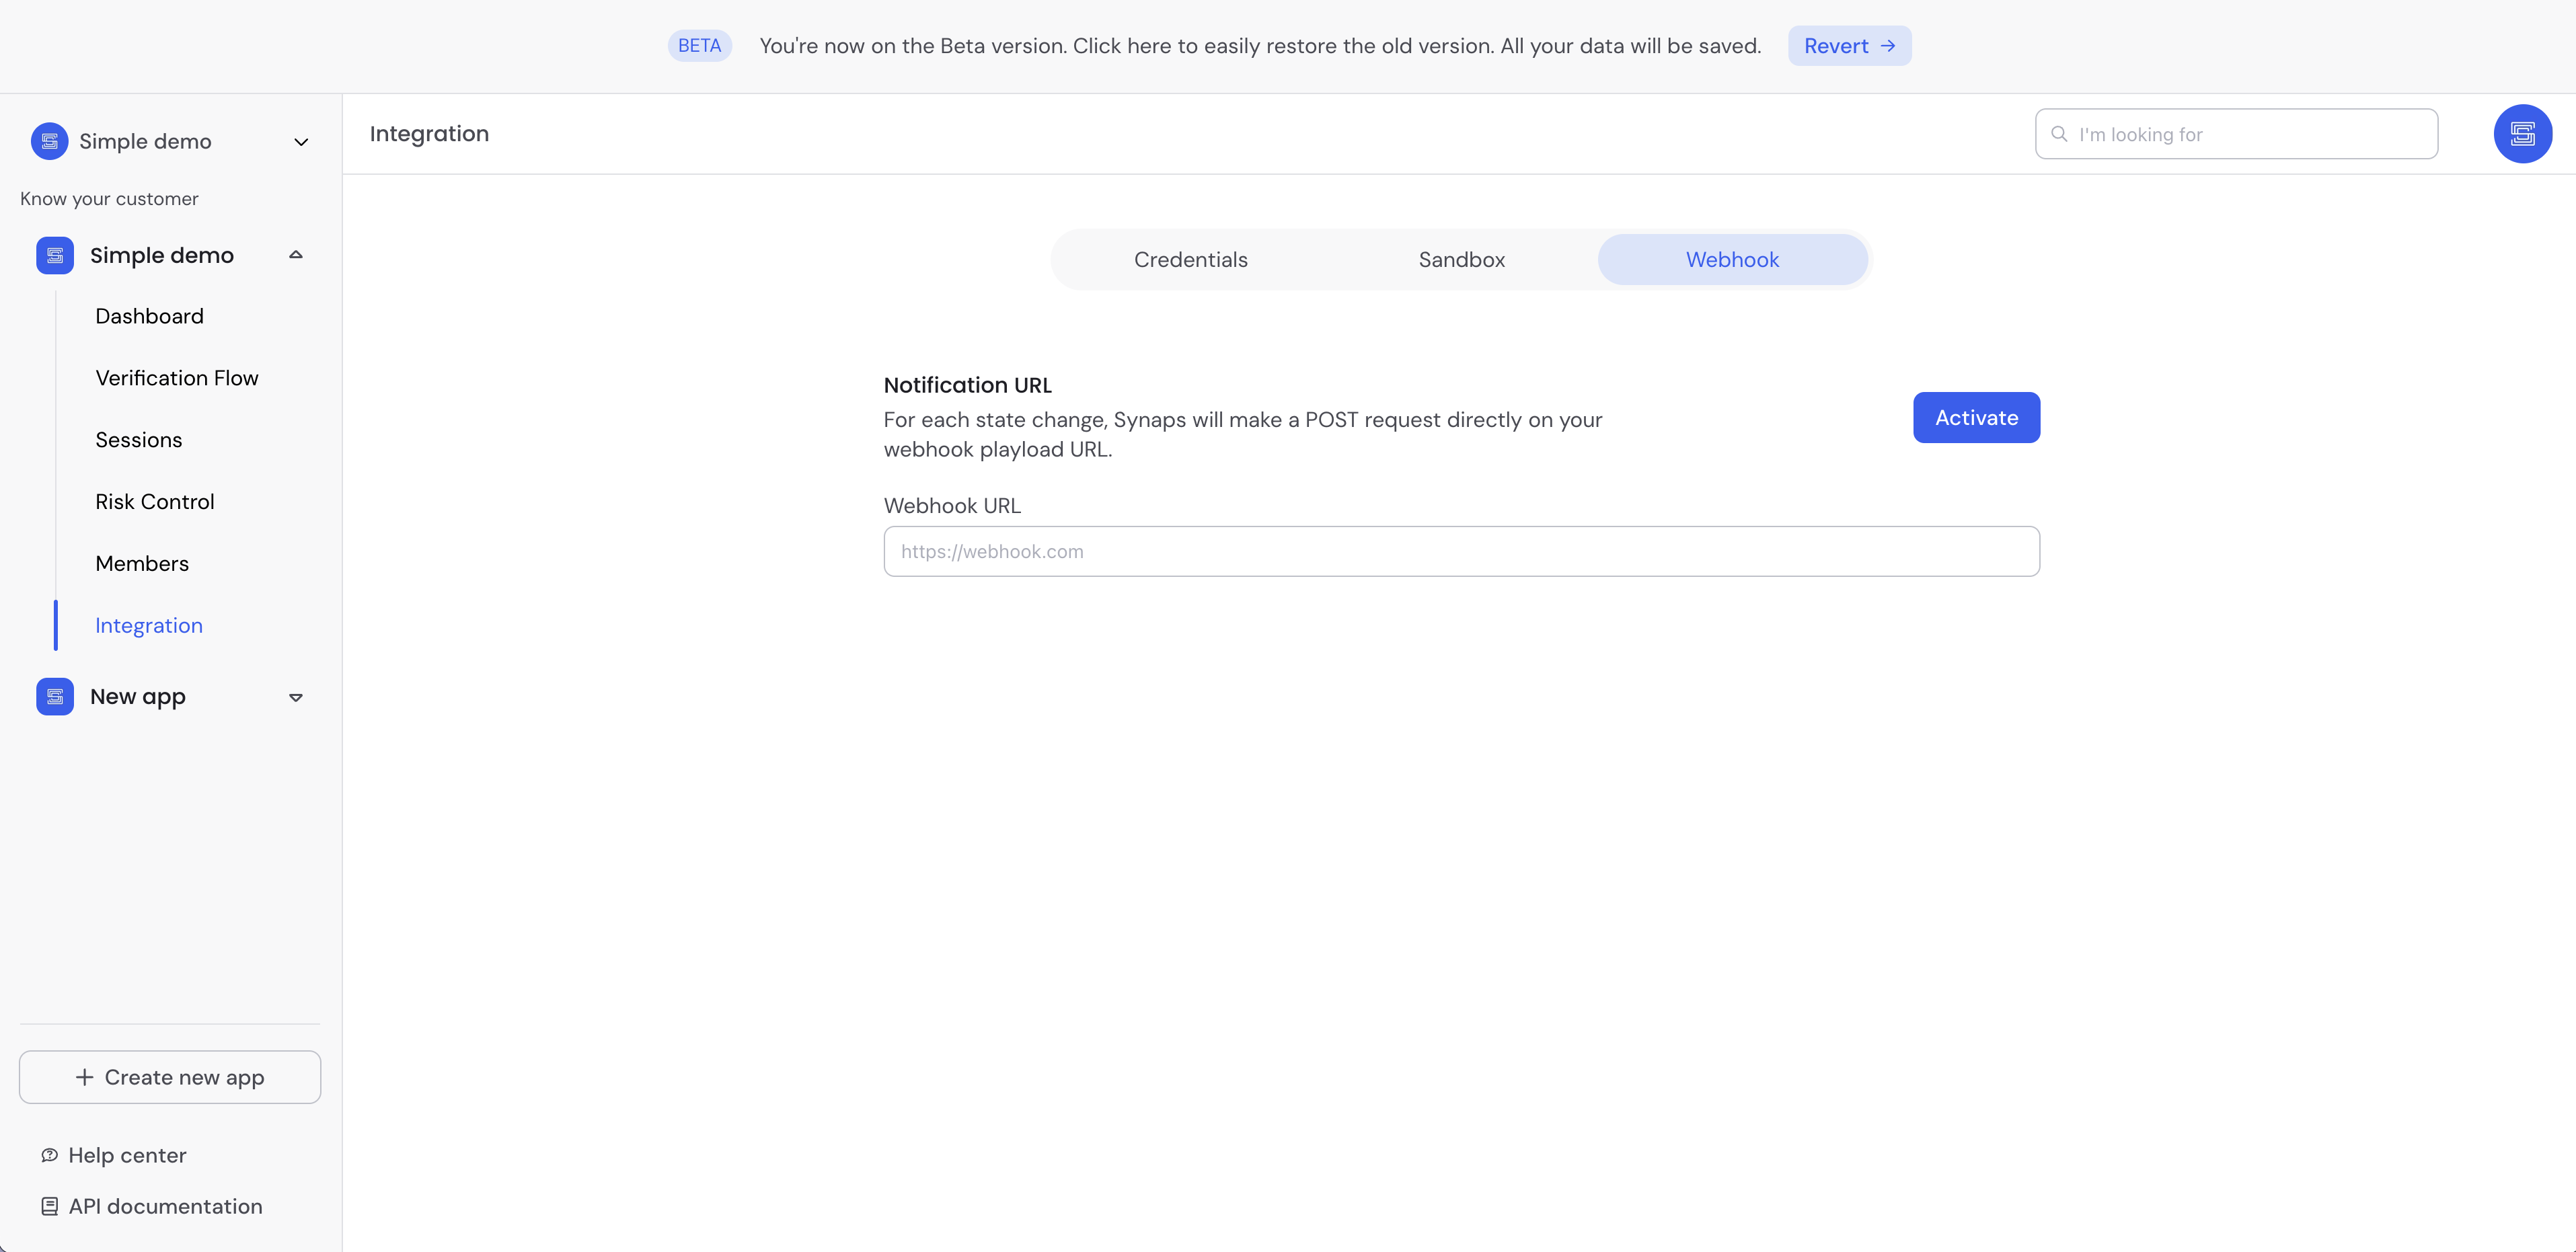
- Congratulations! You successfully added your notification URL.
5. Synchronize data
Get session session details to get an overview of the verification progress
Read API reference for Get session details
{
  "app": {
    "name": "WeStart",
    "id": "990517996973"
  },
  "session": {
    "id": "7cf6c33f-dff8-422d-a696-370db77782d8",
    "status": "SUBMISSION_REQUIRED",
    "sandbox": true,
    "steps": [
      {
        "id": "LIV9905179969733470",
        "status": "SUBMISSION_REQUIRED",
        "type": "LIVENESS"
      },
      {
        "id": "IDD9905179969738103",
        "status": "SUBMISSION_REQUIRED",
        "type": "ID_DOCUMENT"
      },
      {
        "id": "POA9905179969733505",
        "status": "SUBMISSION_REQUIRED",
        "type": "PROOF_OF_ADDRESS"
      }
    ]
  }
}
Once you get the global status of the verification session, you can get in-depth details for each verification step by using Get step details
Read Get step details API reference
What's next?
Great, you're now set up with the Synaps API and you have successfully initalized the Verify SDK.